A few weeks ago, a friend and I spent a few relaxing days at our homestay. We planned on some night photography on one of the evenings. It was a cool, moonless night, perfect for capturing some night shots of the cottages. We switched on all the lights and set up at the far end of the driveway. With the tripod in place, camera settings dialed in, and exposure checked, we began shooting the scene.
The roof was coming out particularly dark, and I wasn’t in the mood to ‘light-paint’ it. The simple solution was to use a longer exposure and later tone down the brighter areas in post-processing, or perhaps create an HDR. I opted for a slightly longer exposure, which resulted in a great shot of the cottages—perfect for marketing purposes.
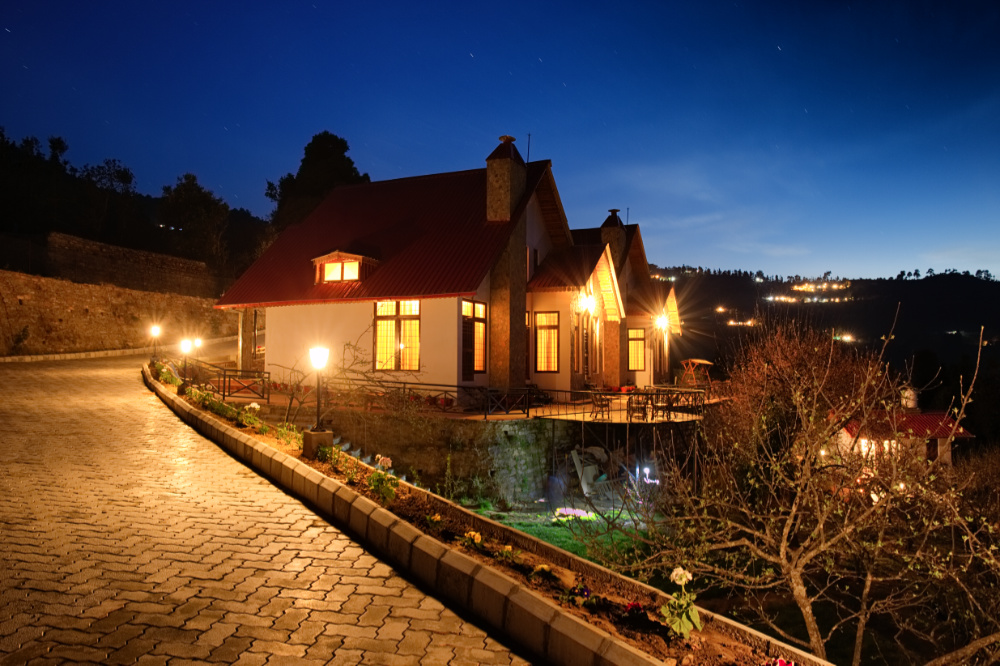
(Night capture of Maini’s Hill Cottages. Everything turned out fine. The enlarged photograph looks beautiful. The only minor thing that I noticed – star trails were starting to develop on the few stars that were visible at that time. I had crossed the so-called 600 rule or the now 500 rule)
Star-Trails Basics
Capturing star trails isn’t rocket science—in fact, it’s one of the easiest ways to get instant ‘wows.’ All you need is a good grasp of the basics.
- Start with a sturdy tripod. Make sure the camera is securely mounted, with all knobs and locks checked to prevent any movement.
- Choose a location with minimal light pollution. Street lights, building lights, and traffic not only harm trees and birds, but they also ruin star trail photography. Light pollution can easily spoil your shot.
- Opt for a night with no moon and clear skies. Avoid nights after dust storms or when clouds are present. It’s simple—clearer skies mean more visible stars, and the more stars you capture, the better and fuller your star trails will be.
- For lenses, I recommend using a wide-angle to normal lens. This allows you to include some foreground, which can help balance the image and minimize noticeable movement in foreground elements.
- Use the ‘T’ mode rather than ‘B.’ Timed mode lets you press the shutter to open and close it without holding it down, unlike Bulb mode, which keeps the shutter open only while it’s pressed. If you don’t have a remote release with a lock, ‘T’ mode is more convenient on modern DSLRs.
- Incorporate a foreground element whenever possible—it adds interest to the composition.
- Finally, and most importantly, shoot in RAW. I’ll explain why when we get into ISO settings later on
Exposure Time required for Star-Trails
The sky rotates 360 degrees in 24 hours, or 0.0042 arc degrees per second. (All right, all right, it is the earth that rotates making us feel that sky rotates… but for simplicity’s sake let’s stick with what I said)
Find out about the angle of view of the lens that you are planning to use. For example – A 50mm lens has an angle of view of around 45-60 degrees. To capture star trails the length of one-quarter of the frame on a full-frame camera, that translates to an exposure of about 1.5 hours or so, depending on the exact angle of view. Try to figure out the calculation yourself using the first fact in this paragraph.
Longer the focal length, lesser is the time required to create star trails.
The easy way out, just note the location of one particular star and start the exposure, enjoy a beer with your friends while the camera records the movement. Come back when the beer gets over or when that particular star seems to have moved considerably.
When photographing star trails, what we’re actually capturing is the linear movement of the stars across the camera’s sensor or film. While the stars’ angular movement in the sky remains constant, the amount of linear movement recorded by the camera will vary depending on where you point it. Near the celestial north, especially close to the North Star (Polaris), the stars appear to move very little, resulting in shorter or no visible trails. So, for more dramatic star trails, aim your camera away from this area and take this factor into account.
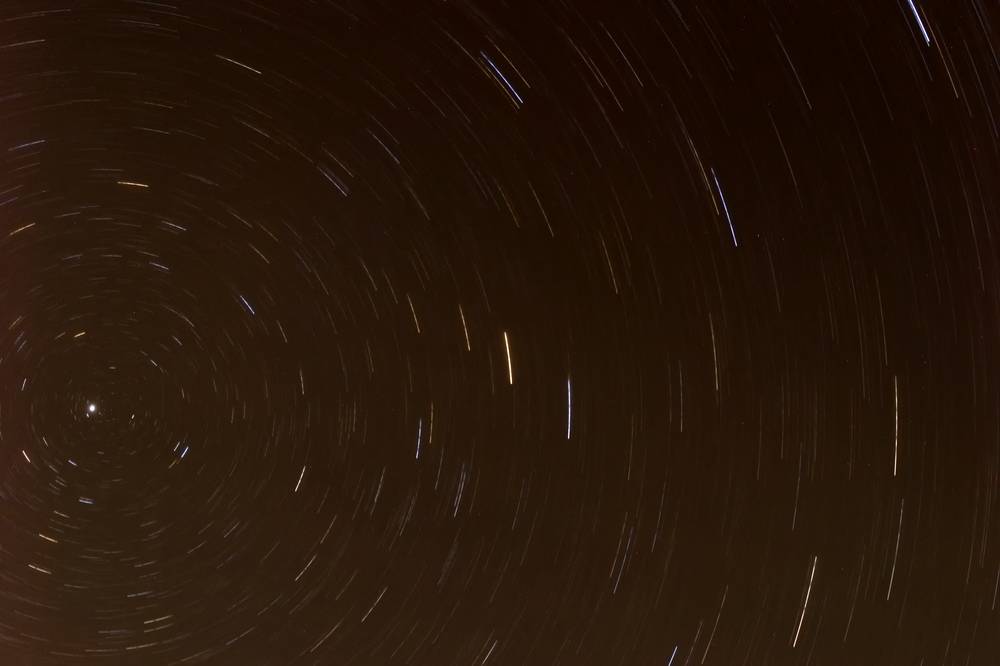
(The bright dot on the left is Polaris or the North Star. Notice how the movement is concentric to it and the outermost trails on the right are considerably longer than the ones closer to Polaris)
Noise – Enemy of Star-Trails
Since most of the background is dark, noise turns out to be the biggest enemy of star-trails. Here are some basics that I wrote about noise earlier – Remove Noise. In star trail photography, there are two primary sources of noise to be aware of: 1) sensor heat and 2) shot noise, caused by irregular amounts of light hitting the sensor.
To minimize noise, the goal is to keep the sensor as cool as possible and ensure that the amount of light reaching the sensor is controlled to avoid shot noise. Reducing noise at the capture stage makes post-processing much easier.
Noise Reduction
Astrophotographers—those who specialize in capturing celestial bodies, including star trails—use various methods to reduce noise.
With older cameras, it’s best to use the camera’s native ISO and then apply noise reduction algorithms. This is the most common and straightforward approach, but long-exposure noise reduction can be time-consuming. It takes as long as the initial exposure, which can be frustrating when every moment counts. The choice is yours, but remember this setting becomes part of the raw file and cannot be undone later (Raw files – what affects them). If you plan on image stacking, be sure to turn off noise reduction.
A slightly more effective technique is to shoot with the lens wide open, allowing more light than necessary and exposing to the right of the histogram (ETTR). This helps capture more detail and reduces noise.
Another tip: keep your camera cool by shooting in colder conditions, like during winter nights. Cold weather not only helps keep the sensor cooler but also offers clearer skies, as long as there’s no fog.
Always shoot in RAW and use noise reduction in post-processing. However, be cautious with luminance noise reduction—it can reduce the number of visible star trails by wiping out the faintest ones. Apply it only after all other adjustments.
Finally, use spotting or cloning tools to eliminate hot pixels, which are common in long exposures.
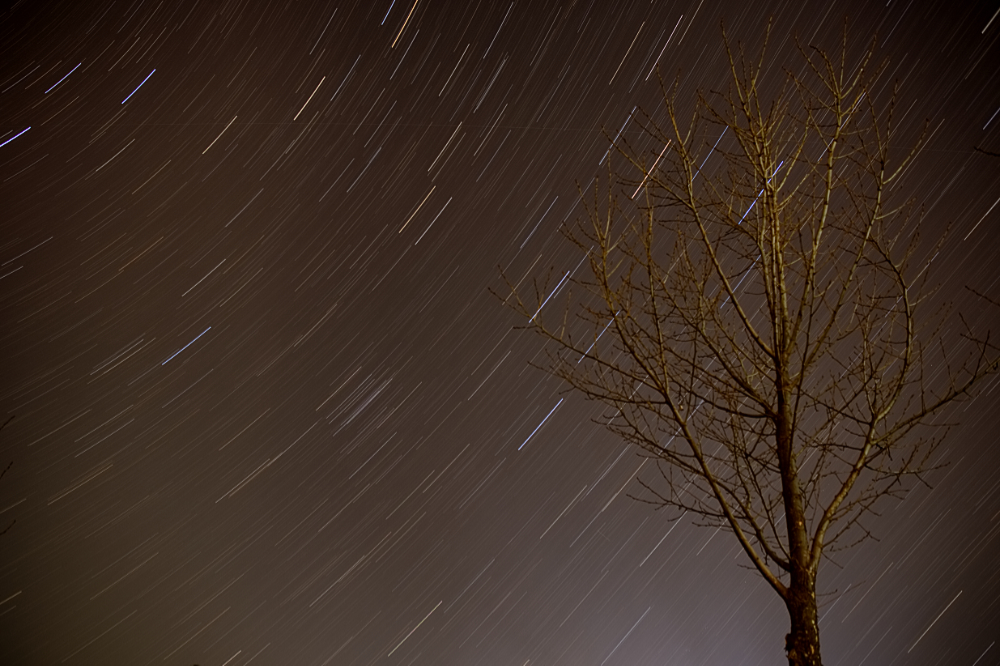
( A 22-minute exposure on native ISO, post-processed on Affinity Photo)
Native ISO or Not?
Some photographers with newer cameras advocate for using a high ISO, like 1600 or 3200 (depending on the camera model), and slightly overexposing the RAW file. The theory is that capturing more light reduces noise, and surprisingly, in many modern cameras, higher ISO settings can actually result in less noise. While this may seem counterintuitive, it’s a fact for certain camera models.
To test this with your own camera, try an experiment in a dark room. Mount your camera on a tripod in manual mode, and photograph a dark object using a fixed combination of aperture, shutter speed, and focus. Vary only the ISO in full stops. In post-processing, apply the same exposure compensation across all images and see which ISO gives the best results. (This technique only works with RAW files.)
Keep in mind that lower ISOs have the advantage of greater dynamic range, which is another factor to consider when choosing your ISO for star trail photography.
The reason behind this is that many modern sensors are ISO-invariant. In simple terms, the sensor doesn’t actually ‘care’ about ISO; it’s the camera’s software that adjusts it. Feel free to reach out if you’d like to know more about how this works.
Stacking
This is the new entrant in the world of star-trails.
When you see a person standing in one place and then after a few seconds you look at him again and the person is standing at a different place. What happened? Easy, the person moved. He moved from the first point to the second point. Our mind subconsciously told that to us.
In stacking for star-trails, something similar happens. Multiple photographs are captured. The software calculates the star trails from these multiple shots and presents a single star-trail photograph with good contrast and less noise. Stacking cancels out the noise that is generated and also the time intervals provide a sensor to cool down.
One such easy to use software – StarStaX. There are many other options too, all you have to do is search on the internet. For star-trails using stacking, I recommend using one of these dedicated softwares rather than using the do-it-all common photo-editors.
If you are planning stacking, these are the things to keep in mind:
- Use manual mode.
- Turn off all kinds of noise reduction protocols. Keeping them ‘on’ may delay the subsequent exposure
- Capture a trial shot to see that the stars are visible at whatever settings you are using.
- Set up an intervalometer to take the shots after every set interval. If your camera doesn’t have one in-built, you’ll have to get a compatible one from the market.
- The number of shots depends on how long you want the star-trails to be, the angle of your composition (how far away or close to the poles you are composing) and the angle of view (focal length of the lens being used).
- The intervals between the shots should be as small as possible. I prefer 1-2 seconds of interval.
Stacking or Long-Exposure
Both techniques have their pros and cons. Long-exposure is a classic, old-school method and is simpler to execute. Stacking, on the other hand, results in images with higher contrast and less noise. Some may feel stacked images look too artificial, while others appreciate their clean appearance. Ultimately, it comes down to personal preference.
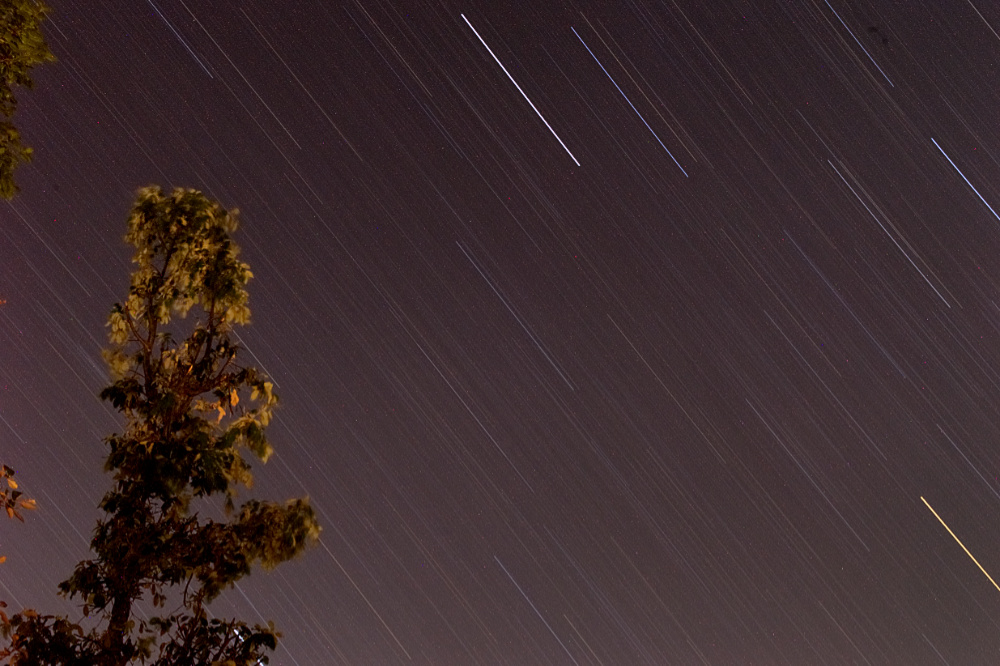
(Just a simple star trail captured from my balcony. Using it as a filler to break the monotony of text)
… and mistakes do happen. A few nights back, after a booze party, I went ahead for some star-trails. I set the exposure to ‘X’ rather than ‘T’ (Camera modes (PSAM and more)). Pressed the shutter release and went away for a long duration. I came back and pressed the shutter release again to supposedly end the exposure. Result – two dark shots, taken a long duration apart! I burst out laughing on checking the preview. Yes, stuff happens!
Star-trails are easy to create. All they require is a sturdy camera with full battery power, lots of patience, and some clarity on how to reduce noise. Compose anything simple with some foreground elements and you’ll have a keeper. For me, apart from being slow-paced, star-trails also give lots of time to introspect, turn philosophical, or just have a good time with some like-minded friends.
This article, originally published on my photography site, is now archived here; while some details may have lost their original context over time, it still offers an intriguing read.
Complete list of archived content – Photography Articles
Discover more from Maini's Hill Cottages
Subscribe to get the latest posts sent to your email.

Nice, full of knowledge article-This site should be a Bible for all prospective photographers who want to hone up their skills.
LikeLike
Very informative posting!!👍
LikeLike
Very nicely written article. Covers almost every point needed for star trail :)
LikeLike
Thanks. The native ISO part required rewriting a couple of time to make things simple. The experimentation part was fun. Thanks for the guidance too.
LikeLike